ESP32 Bluetooth : Bluetooth Classic dan Bluetooth Low Energy (BLE)
Hello, future engineers!!
Welcome to my blog!
My name is Muhamad Fariz Ramadhan from STI 2020 ITB. I made this blog to help you guys out about embedded system especially setting up ESP32 to get some conditions. At this time, I am going to show you how connecting ESP32 using Bluetooth.
*DON'T YOU KNOW??*
There is two types of Bluetooth.
1. Bluetooth Classic
2. Bluetooth Low Energy (BLE)
So, now we're going to connect ESP32 to Bluetooth and display the texts in serial monitor xor in mobile device. Let get started!
STEP 1 : Required Hardware
 |
| source : bluetooth.com |
1. ESP32
2. Breadboard
3. BMP280
4. LED
5. Resistor 330 Ohm
6. Jumper wires male-to-male
7. USB Type-A Cable
8. Android Smartphone with Bluetooth
8. Android Smartphone with Bluetooth
9. Laptop/PC Desktop
STEP 2 : Required Software
1. Download Some Application in your Mobile
a. nRF Connect for Mobile

b. Serial Bluetooth Terminal

STEP 3 : Circuit time & Demonstration
1. Learn the concept
Here is the schematic circuit.

2. Set up the circuit
If you make it, then the circuit would be look like this.

3. Upload the code
a. Bluetooth Low Energy (BLE) : Server
Here is the code for this tutorial. You can go to File > Examples > ESP32 BLE Arduino > BLE_server or you can simply copy this code.
/*
Based on Neil Kolban example for IDF: https://github.com/nkolban/esp32-snippets/blob/master/cpp_utils/tests/BLE%20Tests/SampleServer.cpp
Ported to Arduino ESP32 by Evandro Copercini
updates by chegewara
*/
#include <BLEDevice.h>
#include <BLEUtils.h>
#include <BLEServer.h>
// See the following for generating UUIDs:
// https://www.uuidgenerator.net/
#define SERVICE_UUID "4fafc201-1fb5-459e-8fcc-c5c9c331914b"
#define CHARACTERISTIC_UUID "beb5483e-36e1-4688-b7f5-ea07361b26a8"
void setup() {
Serial.begin(115200);
Serial.println("Starting BLE work!");
BLEDevice::init("Fariz");
BLEServer *pServer = BLEDevice::createServer();
BLEService *pService = pServer->createService(SERVICE_UUID);
BLECharacteristic *pCharacteristic = pService->createCharacteristic(
CHARACTERISTIC_UUID,
BLECharacteristic::PROPERTY_READ |
BLECharacteristic::PROPERTY_WRITE
);
pCharacteristic->setValue("Halo nama saya Fariz");
pService->start();
// BLEAdvertising *pAdvertising = pServer->getAdvertising(); // this still is working for backward compatibility
BLEAdvertising *pAdvertising = BLEDevice::getAdvertising();
pAdvertising->addServiceUUID(SERVICE_UUID);
pAdvertising->setScanResponse(true);
pAdvertising->setMinPreferred(0x06); // functions that help with iPhone connections issue
pAdvertising->setMinPreferred(0x12);
BLEDevice::startAdvertising();
Serial.println("Characteristic defined! Now you can read it in your phone!");
}
void loop() {
// put your main code here, to run repeatedly:
delay(2000);
}
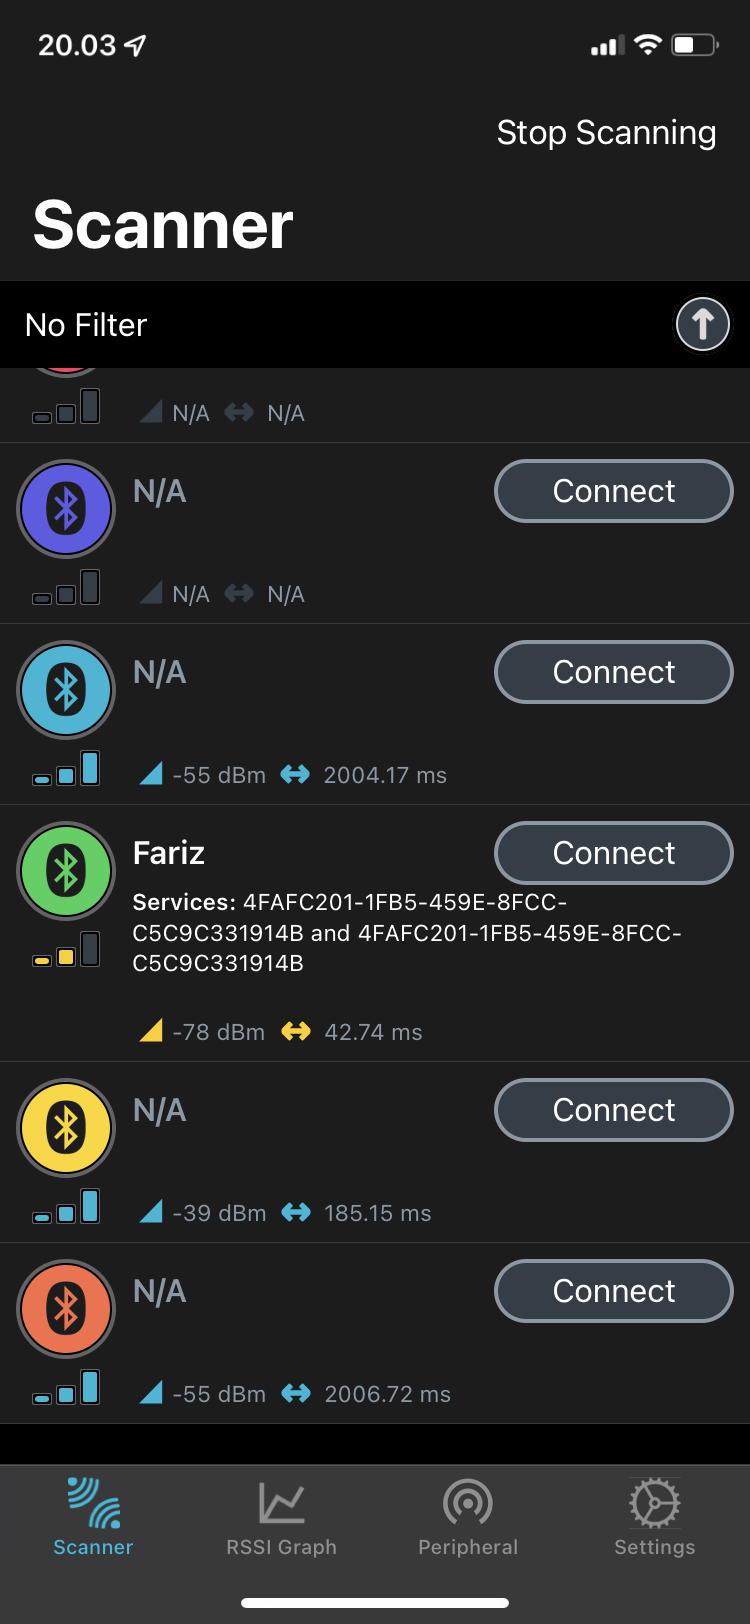
4. Demonstrations
If your code already uploaded, then test the circuit. If it works, the serial monitor will look like this.
*D


b. Bluetooth Classic
a. Smartphone and ESP32 connection
Here is the code for this tutorial. You can go to File > Examples > BluetoothSerial > SerialtoSerialBT or you can simply copy this code.
//This example code is in the Public Domain (or CC0 licensed, at your option.)
//By Evandro Copercini - 2018
//
//This example creates a bridge between Serial and Classical Bluetooth (SPP)
//and also demonstrate that SerialBT have the same functionalities of a normal Serial
#include "BluetoothSerial.h"
#if !defined(CONFIG_BT_ENABLED) || !defined(CONFIG_BLUEDROID_ENABLED)
#error Bluetooth is not enabled! Please run `make menuconfig` to and enable it
#endif
BluetoothSerial SerialBT;
void setup() {
Serial.begin(115200);
SerialBT.begin("ESP32test"); //Bluetooth device name
Serial.println("The device started, now you can pair it with bluetooth!");
}
void loop() {
if (Serial.available()) {
SerialBT.write(Serial.read());
}
if (SerialBT.available()) {
Serial.write(SerialBT.read());
}
delay(20);
}
4. Demonstrations
If your code already uploaded, then test the circuit. If it works, the serial monitor will look like this.
*D


b. Bluetooth use LED and BMP280
Here is the code for this tutorial. You can simply copy this code.
#include <Wire.h>
#include <Adafruit_Sensor.h>
#include <Adafruit_BMP280.h>
#include "BluetoothSerial.h"
#if !defined(CONFIG_BT_ENABLED) || !defined(CONFIG_BLUEDROID_ENABLED)
#error Bluetooth is not enabled! Please run `make menuconfig` to and enable it
#endif
// Bluetooth Serial object
BluetoothSerial SerialBT;
//BMP280 object;
Adafruit_BMP280 bmp;
//GPIO of LED
const int ledPin = 23;
// Handle received and sent messages
String message = "";
char incomingChar;
String temperatureString = "";
// Timer: auxiliar variables
unsigned long previousMillis = 0; // Stores last time temperature was published
const long interval = 10000; // interval at which to publish sensor readings
void setup() {
Serial.begin(115200);
pinMode(ledPin, OUTPUT);
Serial.begin(115200);
// Bluetooth device name
SerialBT.begin("ESP32");
Serial.println("The device started, now you can pair it with bluetooth!");
if (!bmp.begin(0x76)) {
Serial.println(F("Could not find a valid BMP280 sensor, check wiring!"));
while (1);
}
delay(2000);
}
void loop() {
unsigned long currentMillis = millis();
// Send temperature readings
if (currentMillis - previousMillis >= interval){
previousMillis = currentMillis;
temperatureString = bmp.readTemperature();
SerialBT.println(temperatureString);
}
// Read received messages (LED control command)
if (SerialBT.available()){
char incomingChar = SerialBT.read();
if (incomingChar != '\n'){
message += String(incomingChar);
}
else{
message = "";
}
Serial.write(incomingChar);
}
// Check received message and control output accordingly
if (message =="led_on"){
digitalWrite(ledPin, HIGH);
}
else if (message =="led_off"){
digitalWrite(ledPin, LOW);
}
delay(20);
}
4. Demonstrations
If your code already uploaded, then test the circuit. If it works, the serial monitor will look like this.
*D


Komentar
Posting Komentar