ESP32 Web Server : Turn on LED using WiFi from Your Mobile or Desktop
Hello, future engineers!!
Welcome to my blog!
My name is Muhamad Fariz Ramadhan from STI 2020 ITB. I made this blog to help you guys out about embedded system especially setting up ESP32 to get some conditions. At this time, I am going to show you how connecting ESP32 using Web Server.
*DON'T YOU KNOW??*
 |
| source: smarthuby.com |
We can connecting ESP32 to our mobile devices such as computer, handphone, and others. The ESP32 will communicate through a web server connected to WiFi.
What is WiFi actually? Wi-Fi is the wireless technology used to connect computers, tablets, smartphones and other devices to the internet. Wi-Fi is the radio signal sent from a wireless router to a nearby device, which translates the signal into data you can see and use.
So, now we're going to connect ESP32 to WiFi and communicate through a web server. Let get started!
STEP 1 : Required Hardware
 |
| BMP280 source : elekrtolead. |
1. ESP32 Development Board
2. Laptop / PC
3. Micro USB cable
4. BMP280 (soldered)
5. Motherboard
6. Jumper wires
7. LED
8. WiFi or Hotspot Handphone (in this case I'm using wifi)
STEP 2 : Required Software
1. Download and install Arduino IDE

You can download Arduino IDE from this link: https://www.arduino.cc/en/software and choose suitable version for your laptop / PC. After that, please install the app by following the instructions. You can check my other blog here for more information.
2. Open Arduino IDE and install BMP280 library
After Arduino get installed then we have to set up the app to suitable for BMP280
Go to Tools > Manage Libraries. Then, search "BMP280" and install the 2 of top; Adafruit and BMP280_DEV.

STEP 3 : Circuit time & Demonstration
A. Advanced Weather Station using Web Server
1. Learn the concept
Basically, we're going to connect only 4 of 6 BMP280's pin to ESP32, Here is the schematic illustration.

2. Set up the circuit
From the illustration above, we can state that the situation of the circuit is:
- a. VCC connect to 3V3b. GND connect to GNDc. SCL connect to GPIO (in this tutorial, I'm using GPIO22)d. SDA connect to GPIO (in this tutorial, I'm using GPIO21)
If you make it, then the circuit would be look like this.
 |
| Condition 1 : Using jumper male to female |
or
 |
| Condition 2: Using jumper male to male |
3. Upload the code
Here is the code for this tutorial.
/*********
Rui Santos
Complete project details at https://randomnerdtutorials.com
*********/
// Load Wi-Fi library
#include <WiFi.h>
#include <Wire.h>
#include <Adafruit_BMP280.h>
#include <Adafruit_Sensor.h>
#define SEALEVELPRESSURE_HPA (1013.25)
Adafruit_BMP280 bmp; // I2C
// Replace with your network credentials
const char* ssid = "Rumah Kedua";
const char* password = "1122334455";
// Set web server port number to 80
WiFiServer server(80);
// Variable to store the HTTP request
String header;
// Current time
unsigned long currentTime = millis();
// Previous time
unsigned long previousTime = 0;
// Define timeout time in milliseconds (example: 2000ms = 2s)
const long timeoutTime = 2000;
void setup() {
Serial.begin(115200);
bool status;
// default settings
// (you can also pass in a Wire library object like &Wire2)
//status = bmp.begin();
if (!bmp.begin(0x76)) {
Serial.println("Could not find a valid BMP280 sensor, check wiring!");
while (1);
}
// Connect to Wi-Fi network with SSID and password
Serial.print("Connecting to ");
Serial.println(ssid);
WiFi.begin(ssid, password);
while (WiFi.status() != WL_CONNECTED) {
delay(500);
Serial.print(".");
}
// Print local IP address and start web server
Serial.println("");
Serial.println("WiFi connected.");
Serial.println("IP address: ");
Serial.println(WiFi.localIP());
server.begin();
}
void loop(){
WiFiClient client = server.available(); // Listen for incoming clients
if (client) { // If a new client connects,
currentTime = millis();
previousTime = currentTime;
Serial.println("New Client."); // print a message out in the serial port
String currentLine = ""; // make a String to hold incoming data from the client
while (client.connected() && currentTime - previousTime <= timeoutTime) { // loop while the client's connected
currentTime = millis();
if (client.available()) { // if there's bytes to read from the client,
char c = client.read(); // read a byte, then
Serial.write(c); // print it out the serial monitor
header += c;
if (c == '\n') { // if the byte is a newline character
// if the current line is blank, you got two newline characters in a row.
// that's the end of the client HTTP request, so send a response:
if (currentLine.length() == 0) {
// HTTP headers always start with a response code (e.g. HTTP/1.1 200 OK)
// and a content-type so the client knows what's coming, then a blank line:
client.println("HTTP/1.1 200 OK");
client.println("Content-type:text/html");
client.println("Connection: close");
client.println();
// Display the HTML web page
client.println("<!DOCTYPE html><html>");
client.println("<head><meta name=\"viewport\" content=\"width=device-width, initial-scale=1\">");
client.println("<link rel=\"icon\" href=\"data:,\">");
// CSS to style the table
client.println("<style>body { text-align: center; font-family: \"Trebuchet MS\", Arial;}");
client.println("table { border-collapse: collapse; width:35%; margin-left:auto; margin-right:auto; }");
client.println("th { padding: 12px; background-color: #0043af; color: white; }");
client.println("tr { border: 1px solid #ddd; padding: 12px; }");
client.println("tr:hover { background-color: #bcbcbc; }");
client.println("td { border: none; padding: 12px; }");
client.println(".sensor { color:white; font-weight: bold; background-color: #bcbcbc; padding: 1px; }");
// Web Page Heading
client.println("</style></head><body><h1>ESP32 with BMP280</h1>");
client.println("<table><tr><th>MEASUREMENT</th><th>VALUE</th></tr>");
client.println("<tr><td>Temp. Celsius</td><td><span class=\"sensor\">");
client.println(bmp.readTemperature());
client.println(" *C</span></td></tr>");
client.println("<tr><td>Temp. Fahrenheit</td><td><span class=\"sensor\">");
client.println(1.8 * bmp.readTemperature() + 32);
client.println(" *F</span></td></tr>");
client.println("<tr><td>Pressure</td><td><span class=\"sensor\">");
client.println(bmp.readPressure() / 100.0F);
client.println(" hPa</span></td></tr>");
client.println("<tr><td>Approx. Altitude</td><td><span class=\"sensor\">");
client.println(bmp.readAltitude(SEALEVELPRESSURE_HPA));
client.println(" m</span></td></tr>");
// The HTTP response ends with another blank line
client.println();
// Break out of the while loop
break;
} else { // if you got a newline, then clear currentLine
currentLine = "";
}
} else if (c != '\r') { // if you got anything else but a carriage return character,
currentLine += c; // add it to the end of the currentLine
}
}
}
// Clear the header variable
header = "";
// Close the connection
client.stop();
Serial.println("Client disconnected.");
Serial.println("");
}
}
*URGENT*

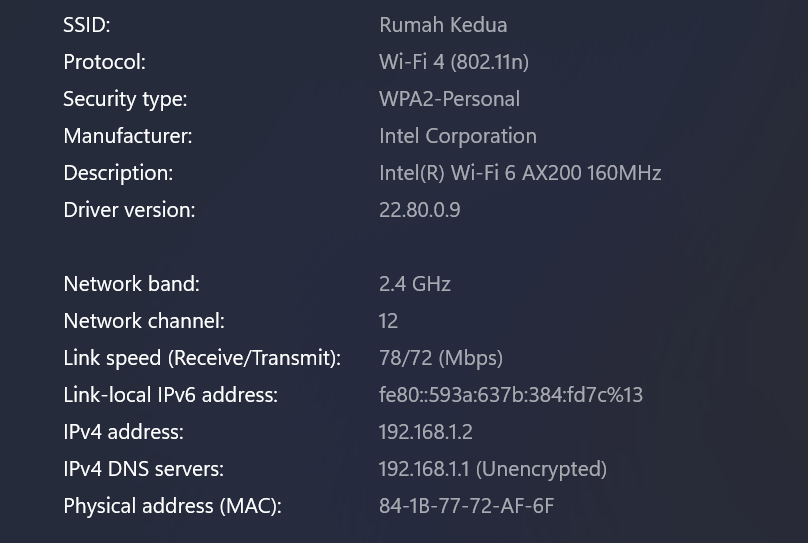
At this section of code don't forget to replace it with your own WiFi SSID and Password. You can check it from WiFi setting and would show some information of your WiFi.
4. Demonstrations
If your code already uploaded, then test the circuit. If it works, the serial monitor will look EMPTY like this.

then, you have to press EN button on your ESP32 to make the ESP32 connect to WiFi.


B. Turn on LED via Web Server
1. Learn the concept
Here is the schematic illustration.

2. Set up the circuit
From the illustration above, we can state that the situation of the circuit is
2 LEDs connected to GPIO 26 and GPIO 27. The LEDs are also connected to GND via a resistor
If you make it, then the circuit would be look like this.

3. Upload the code
Here is the code for this tutorial.
/*********
Rui Santos
Complete project details at http://randomnerdtutorials.com
*********/
// Load Wi-Fi library
#include <WiFi.h>
// Replace with your network credentials
const char* ssid = "Rumah Kedua";
const char* password = "1122334455";
// Set web server port number to 80
WiFiServer server(80);
// Variable to store the HTTP request
String header;
// Auxiliar variables to store the current output state
String output26State = "off";
String output27State = "off";
// Assign output variables to GPIO pins
const int output26 = 26;
const int output27 = 27;
// Current time
unsigned long currentTime = millis();
// Previous time
unsigned long previousTime = 0;
// Define timeout time in milliseconds (example: 2000ms = 2s)
const long timeoutTime = 2000;
void setup() {
Serial.begin(115200);
// Initialize the output variables as outputs
pinMode(output26, OUTPUT);
pinMode(output27, OUTPUT);
// Set outputs to LOW
digitalWrite(output26, LOW);
digitalWrite(output27, LOW);
// Connect to Wi-Fi network with SSID and password
Serial.print("Connecting to ");
Serial.println(ssid);
WiFi.begin(ssid, password);
while (WiFi.status() != WL_CONNECTED) {
delay(500);
Serial.print(".");
}
// Print local IP address and start web server
Serial.println("");
Serial.println("WiFi connected.");
Serial.println("IP address: ");
Serial.println(WiFi.localIP());
server.begin();
}
void loop(){
WiFiClient client = server.available(); // Listen for incoming clients
if (client) { // If a new client connects,
currentTime = millis();
previousTime = currentTime;
Serial.println("New Client."); // print a message out in the serial port
String currentLine = ""; // make a String to hold incoming data from the client
while (client.connected() && currentTime - previousTime <= timeoutTime) { // loop while the client's connected
currentTime = millis();
if (client.available()) { // if there's bytes to read from the client,
char c = client.read(); // read a byte, then
Serial.write(c); // print it out the serial monitor
header += c;
if (c == '\n') { // if the byte is a newline character
// if the current line is blank, you got two newline characters in a row.
// that's the end of the client HTTP request, so send a response:
if (currentLine.length() == 0) {
// HTTP headers always start with a response code (e.g. HTTP/1.1 200 OK)
// and a content-type so the client knows what's coming, then a blank line:
client.println("HTTP/1.1 200 OK");
client.println("Content-type:text/html");
client.println("Connection: close");
client.println();
// turns the GPIOs on and off
if (header.indexOf("GET /26/on") >= 0) {
Serial.println("GPIO 26 on");
output26State = "on";
digitalWrite(output26, HIGH);
} else if (header.indexOf("GET /26/off") >= 0) {
Serial.println("GPIO 26 off");
output26State = "off";
digitalWrite(output26, LOW);
} else if (header.indexOf("GET /27/on") >= 0) {
Serial.println("GPIO 27 on");
output27State = "on";
digitalWrite(output27, HIGH);
} else if (header.indexOf("GET /27/off") >= 0) {
Serial.println("GPIO 27 off");
output27State = "off";
digitalWrite(output27, LOW);
}
// Display the HTML web page
client.println("<!DOCTYPE html><html>");
client.println("<head><meta name=\"viewport\" content=\"width=device-width, initial-scale=1\">");
client.println("<link rel=\"icon\" href=\"data:,\">");
// CSS to style the on/off buttons
// Feel free to change the background-color and font-size attributes to fit your preferences
client.println("<style>html { font-family: Helvetica; display: inline-block; margin: 0px auto; text-align: center;}");
client.println(".button { background-color: #4CAF50; border: none; color: white; padding: 16px 40px;");
client.println("text-decoration: none; font-size: 30px; margin: 2px; cursor: pointer;}");
client.println(".button2 {background-color: #555555;}</style></head>");
// Web Page Heading
client.println("<body><h1>ESP32 Web Server</h1>");
// Display current state, and ON/OFF buttons for GPIO 26
client.println("<p>GPIO 26 - State " + output26State + "</p>");
// If the output26State is off, it displays the ON button
if (output26State=="off") {
client.println("<p><a href=\"/26/on\"><button class=\"button\">ON</button></a></p>");
} else {
client.println("<p><a href=\"/26/off\"><button class=\"button button2\">OFF</button></a></p>");
}
// Display current state, and ON/OFF buttons for GPIO 27
client.println("<p>GPIO 27 - State " + output27State + "</p>");
// If the output27State is off, it displays the ON button
if (output27State=="off") {
client.println("<p><a href=\"/27/on\"><button class=\"button\">ON</button></a></p>");
} else {
client.println("<p><a href=\"/27/off\"><button class=\"button button2\">OFF</button></a></p>");
}
client.println("</body></html>");
// The HTTP response ends with another blank line
client.println();
// Break out of the while loop
break;
} else { // if you got a newline, then clear currentLine
currentLine = "";
}
} else if (c != '\r') { // if you got anything else but a carriage return character,
currentLine += c; // add it to the end of the currentLine
}
}
}
// Clear the header variable
header = "";
// Close the connection
client.stop();
Serial.println("Client disconnected.");
Serial.println("");
}
}
4. Demonstrations
If your code already uploaded, then test the circuit. If it works, the serial monitor will look like this. (Using the same way as "Advanced Weather Station")


Here is the video demonstration


Komentar
Posting Komentar